Why you should be eating oysters

oyster-frenzy-melbourne

Oysters are saltwater bivalve mollusks that live in marine habitats such as bays and oceans. Mostly known for their reported aphrodisiac qualities, these mollusks have a lot to offer in terms of health benefits.

They are an excellent source of protein, healthy omega-3 fatty acids, vitamins and minerals all critical to optimal human performance.

Why it’s a superfood?

  • Excellent source of protein, vitamin B12, zinc and selenium;
  • Good source of copper, iron and manganese;
  • Contains omega-3 fatty acids.

Nutritional powerhouse
Oysters offer an outstanding nutritional profile which is only really rivalled by organ meats.  Extremely high in a variety of important nutrients and low in total calories, oysters are an incredibly nutrient dense food source.

Natural Aphrodisiac
Are oysters an aphrodisiac? The question of whether or not raw oysters can cause sexual arousal has long been debated. Unfortunately, there is actually very little evidence to suggest this is the case.

That being said, why have oysters been so long associated as an aphrodisiac? Most likely because oysters are an excellent source of zinc, a mineral critical sexual health.

Oysters also contain varying levels of dopamine, a neurotransmitter that stimulates the ‘arousal’ centre in the brain (including sexual arousal). This mechanism could potentially take effect  immediately, giving you a psychological edge and boost sexual arousal and performance.

Whilst the evidence may not support improved sexual health, it will provide many nutrients that will improve overall health and performance.

Making the most of oysters
Oysters can be eaten either raw or cooked. To note, there is a small concern for bacterial infection. Oysters occasionally contain a species of bacteria called Vibrio vulnificus, which can more dangerous than salmonella in susceptible people with compromised immune function.

If you have any concern, steaming or boiling are both popular methods which kill off any harmful bacteria and will not cause any loss of nutrition.

Beef liver: the original superfood

beef_liver

Beef liver has a long history as a traditionally valued food. Often eaten by traditional cultures as soon as practicable, even in preference over the muscle meat. In fact, some traditional cultures only consumed the organ meats, with the leaner muscle meats being often discarded or given to away to wolves / early dogs.

More recently, especially in Western cultures, organ meats like beef liver have fallen out of the regular rotation in favour of the leaner, more palatable muscle meats.

Most local butchers will stock beef liver, but you will probably need to ask as they keep most of the organ meats away from the public eye in cool rooms / freezers due to the limited sales. By comparison, the selection of muscle cuts from all animals is often more readily available for viewing and purchase. Organ meats like beef liver are actually very cheap when compared to the more popular cuts of muscle meat and pack a real bang for your buck when you consider the nutrient density. 

In fact, it’s one of the most nutritious foods on the planet.

Nutrition

A dense source of protein, vitamins and minerals critical to human performance packed into a single food source. Just a quick look at some of the key nutrients in 100 grams of beef liver paints a powerful picture:

  • Protein: 27 grams
  • Vitamin A: 26,091 IU | 522% DV
  • Vitamin B2: 3.4 mg | 201% DV
  • Vitamin B3: 17.5 mg | 87% DV
  • Vitamin B6: 1 mg | 51% DV
  • Vitamin B9 (folate): 260 mcg | 65% DV
  • Vitamin B12: 83.1 mcg | 1386% DV
  • Choline: 418 mg
  • Copper: 14.6 mg | 730% DV
  • Iron: 6.2 mg | 34% DV
  • Selenium: 32.8 mcg | 47%
  • Zinc: 5.2 mg | 35% DV

How to get more liver into the diet

Here are just a few ways to get more of this nutrient dense superfood into the diet:

  • Pan fried. Liver goes well when fried with onions;
  • Bolognese sauces. Liver and other organ meats can be chopped or minced and then mixed with regular ground beef and added to pasta or vegetable dishes;
  • Burger patties. As with Bolognese sauces, chop or mince organ meats and mix it with ground beef to make highly nutritious burgers.
  • Liverloaf. This is basically a meatloaf that is prepared with a mix of both beef and liver mince.

Fasting: hour by hour

How long should you fast? That depends on which health benefits you’re trying to tap into. The longer you do fast however, the more the health benefits begin to add up.

This does not mean that long fasts are for everybody. It depends. As an example, if you’re just trying to increase ketone levels for sustained energy and improved cognitive performance, then a 17 or 18 hour fast (which can be performed daily) might be enough. However, if you’re trying to reduce chronic inflammation or metabolic disorder then stretching it out to about 72 hours could stimulate the appropriate physiological response.

Here are the benefits of fasting broken down by the number of hours fasted:

13-16 hour fast

A 13-16 hour fast is considered to be intermittent fasting and can be conducted daily. At 13 hours of fasting, the digestive system down regulates (goes to sleep) and your body will begin to secrete more human growth hormone (HGH). The HGH assists in a variety of processes including the maintenance of lean mass, burning fat and slowing down the ageing process.

At this point, the body is transitioning to the use of stored body fat for immediate energy. 

16 hour fast

This is when most people begin to produce additional ketones. Ketones are a sign that the liver has transitioned from burning glucose (sugar) to burning fats for energy. In addition, ketones are neuro-protective and will move into the brain, giving you energy and a greater mental clarity. 

Also, HGH production continues to increase and the body begins to accelerate the fat burning process.

18-24 hour fast

At 18 hours, the body will begin to stimulate autophagy. What this means is your cells internal intelligence has been switched on and they are able to repair themselves by cleaning out old and / or damaged cells.

At 24 hours, your intestinal cells reboot and GABA production increases. GABA is the neurotransmitter known to relax the brain and help with anxiety.

At this point in time, the body would have depleted its liver glycogen stores and would now be operating primarily on ketones (from the break down of fatty acids) for energy.

36 hour fast

The longer you fast, the more it forces your body to deplete glycogen stores, and release stored energy in the form of body fat (an evolutionary adaption in response to not having a constant food source). As the body breaks down stored body fat and converts it to usable energy, the body also releases toxins that have also been stored within the fat cells. Proper hydration and even supplementation with a binder, such as charcoal may help the body to eliminate toxins during periods of fasting.

36-48 hour fasts is where to start to see an increase in stem cell regeneration, fat loss, greater anti-ageing benefits, and an increase in dopamine levels.

At this point, autophagy increases by approx. 300%.

48 hour fast

At 48 hours, cellular regeneration commences and inflammation begins to decrease. Autophagy continues to increase and the body begins to reset dopamine receptor sites.

72 hour fast

This is where autophagy peaks.

+ 72 hour fasting

Although longer fasts can be beneficial, fasting for periods greater than 72 hours should only be conducted under medical supervision or with consultation.


Kettlebell exercises you should be doing

kbswing-1451492102

Why spend so much time in the gym isolating muscle groups when you can build dynamic total-body strength and conditioning with kettlebells?

The kettlbell has been around the fitness industry for many years. More recently, they have been gaining more popularity with CrossFit, F45 and a variety of other high intensity circuit type training programs.

When used correctly, kettlebells are extremely effective training tools for providing total-body strength and conditioning. The problem is that most people use kettlebells incorrectly. Like any other movement within the gym, proper coaching and execution is required to maximise the benefit.

The army often uses the term “be brilliant at the basics” and elite athletes are usually elite because they’re better at the fundamentals than everybody else. Mastering the fundamentals is critical to success. In training and in life.

The fundamentals of kettlebell training can be broken down into a handful of exercises. If you can master these movements you’ll be well on the way to developing a highly conditioned physique.

Below is a list of exercises that form the fundamentals of kettlebell training:

The Goblet Squat
The squat is one of the 5 basic movement patterns and has many variations. The goblet squat isn’t just a lower body exercise… it’s a full-body conditioning exercise that promotes optimal mobility.

Check out this article for a more detailed description of the goblet squat.

The Swing
The kettlebell swing, in which you project the kettlebell to shoulder-height only, is an insanely effective exercise when executed with proper form. Hip power, hip hinging, and breathing techniques make it incredibly powerful.

It’s a two-for-one exercise, meaning you’re able to combine strength training and cardiovascular conditioning into one efficient movement.

Check out this article for a more detailed description of the kettlebell swing.

The Get-up
The get-up is a slow, deliberate movement that’s been around for centuries. The get-up will help you with functional tasks as well as higher-level exercises. It teaches you to move fluidly, and when you add the external load (such as a kettlebell) it requires strength, mobility, coordination and is a skilled movement.

Check out this article for a more detailed description of the get-up.

The Clean
Similar to the kettlebell swing, the clean is another explosive exercise for total-body strength and conditioning. The main difference from the swing is that the kettlebell finishes in the rack position as opposed to being projected horizontally away from your body.

As defined by Pavel Tsatsouline, an accurate description of the kettlebell clean is:

  • Pick up the kettlebell, swing it back between your legs as if for a swing, and bring it to the rack in one swift movement.
  • Then drop the kettlebell back between your legs and repeat the drill for repetitions.

This movement can take some time to learn, but once you have it mastered it can be used high-powered kettlebell strength and conditioning complexes.

The Press
If you have mastered the earlier exercises, you should have demonstrated appropriate shoulder mobility and stability required to press.

The kettlebell press is another exceptional movement to learn. The press is not just a shoulder exercise, as you are required to recruit muscle activation from the entire body for maximum pressing power and strength.

If you work on your overhead presses hard enough, you will hardly need to do anything else for your upper body and midsection.

The condition:

  • Clean the kettlebell and press it strictly overhead to lockout.

The standard:

  • Pause for a moment, in the rack position to ensure that you are not using any momentum generated by the clean, for the press.
  • Press with the knees softly locked and with minimal back / side bend.
  • Keep the whole body tight, specifically the midsection, glutes and quads.
  • Keep the pressing shoulder down.
  • Lock out the elbow completely and pause at the top.

There are two ways to press overhead for repetitions. The first being to clean the kettlebell before each press. This is known as the “clean-and-press”. The second method is cleaning the kettlebell once, then pressing it multiple times from the rack position. This is known as the “military press”.

Homemade Sourdough Bread

The year 2020 has been fairly eventful. Bushfires. The untimely death of Kobe and Gianna Bryant. The coronavirus global pandemic and the societal lockdowns that followed. I have noticed that a lot of people on social media have been making their own sourdough breads whilst in isolation.

This is a skill that I have been wanting to learn for a while.

Here is the recipe that I used to make my very own sourdough bread. No kneading required. First, I made my own sourdough starter, which took 5-7 days mature. This recipe only requires the starter to be mixed with water and flour, then letting the mixture rise naturally overnight to finally bake in the morning.

What is sourdough bread?

Simply put, it’s a bread made without the use of a commercial yeast, but with a sourdough starter or culture instead. The starter is what makes the bread rise. Generally, breads made with a sourdough starter have more flavour than yeasted bread.

Equipment required

  • 4-6 quart cast iron dutch oven with lid (or bread baker)
  • some mixing bowls
  • measuring cup
  • digital kitchen scale

How to make sourdough bread (quick version)

  1. Mix the flours (520 grams) and salt (2-3 teaspoons) together.
  2. Mix sourdough starter and water together (90 grams starter with 385 grams water).
  3. Combine all in a medium bowl, until flour is fully incorporated.
  4. Let rest 15 minutes. Stretch the dough, inside the bowl. Repeat 15 minutes later.
  5. Cover and leave to rest on the kitchen counter for 9-12 hours (at room temperature).
  6. In the morning, stretch, fold and shape. Place in a parchment-lined bowl, let rise for 1 hour in the refrigerator and preheat the oven.
  7. Score.
  8. Bake 35-40 minutes.

How to schedule sourdough bread?

  1. 12 noon: Feed the sourdough starter. 4-8 hours before you plan to mix up the dough, feed your starter (alternatively, you can use the unfed starter straight from the fridge at 8 pm).
  2. 8 pm: Mix. Mix flours and salt, and mix starter and water, and mix all into a ball. After 15 mins, stretch the dough, using the “stretch and fold” technique. Cover for 15 more minutes and repeat the stretch and fold.
  3. Proof. Cover with plastic wrap or a wet towel, to proof (rise) overnight, or 9-12 hours at room temperature on the kitchen counter.
  4. 7-8 am. Shape. Check your dough and when it has almost doubled in size, stretch, fold, and shape. Place in a parchment-lined bowl, dusted with flour.
  5. Final Rise and Preheat Oven. Place the shaped dough in the fridge for 1 hour while you preheat the oven (heating up your dutch oven or bread baker too, for 50-60 minutes at 250C) 
  6. 9 am: Place and score. Pull your heated dutch oven out of the oven. Lift your shaped dough, either flipping or lifting out by the parchment, carefully place into the hot dutch oven. 
  7. Score the bread using a sharp knife (lightly oiled) or bread lame, cutting a single slash slit into the dough, about an inch (2 cm) deep.
  8. Bake with the lid on for 20 minutes. Remove lid, lower heat to 200C and bake 15-20 more minutes, until very deeply golden. You will want it darker than you might think. Let it cool on a rack before cutting. If you like a softer crust bake covered 25 minutes, uncovered 10-15 minutes.
  9. 10 am: Bon appetite!

Making your own sourdough starter

808B8AAD-E990-42F1-828E-B2CBF5C6D47D

During the lockdown period I decided to teach myself how to make real sourdough bread from scratch. The step in this process is to make your own sourdough starter, or culture.

I will post a second part to this article detailing my attempt at preparing and baking an actual loaf of sourdough bread.

What is a sourdough starter?
Also known as a sourdough culture, a starter is a mixture of flour and water which acts as a leavening agent. Wild yeast is present in all flour and a starter is a way to activate the yeast in order to bake with it. The sourness comes from the living bacteria growing alongside the yeast in the starter.

As the starter matures the wild yeast and bacteria develop making it stronger and more complex in flavour.

Only a small amount of sourdough starter is needed to make a loaf of bread. Wild yeast works more slowly than commercial yeast so recipes made with a sourdough starter will typically take longer to make.

Making a sourdough starter is a simple process of combining flour and water, which is then subsequently ‘fed’ or refreshed with more flour and water over a period to encourage the yeast to ferment and the bacteria to develop.

Sourdough starter timeline
The process of making a sourdough starter can be lengthy (about 5 or 6 days), it is not complicated. This is the process that I have used with success.

If the process below is followed, you should be well on the way to creating you very own sourdough starter:

Day 0
125 g flour + 125 g water, stand for 48 hours.

  1. Place the flour and water in a mixing bowl and stir until well combined.
  2. Transfer the mixture to a glass jar, seal and set aside in a warm draught-free place for about 48 hours.

Variations
Rye or wholemeal flour can be substituted for plain flour for variety.

Day 2
1st feeding: 125 g starter + 125 g flour + 125 g water, stand for 24 hours.

  1. Remove and discard all but 125 g of the sourdough starter from the jar.
  2. Add 125 g plain flour and 125 g water to the jar and stir well to combine.
  3. Seal the jar and set aside in a warm, draught-free place for 24 hours.

After the first feeding and rise, the starter should have risen slightly (up to 50%). Random bubbles should become visible on the surface as well as through the side of the jar indicating the wild yeast is active and starting the multiply.

Day 3
2nd feeding: 125 g starter + 125 g flour + 125 g water, stand for 24 hours.

  1. Remove and discard all but 125 g of the sourdough starter from the jar.
  2. Add 125 g plain flour and 125 g water to the jar and stir well to combine.
  3. Seal the jar and set aside in a warm, draught-free place for 24 hours.

After the second feeding and rise there will be more visible bubbles but they will be smaller and more uniform.

Day 4
3rd feeding: 125 g starter + 125 g flour + 125 g water, stand until doubled in size (8-24 hours).

  1. Remove and discard all but 125 g of the sourdough starter from the jar.
  2. Add 125 g plain flour and 125 g water to the jar and stir well to combine
  3. Seal the jar and set aside in a warm, draught-free place until doubled in size (8-24 hours, depending on the strength of your starter).

After the third feeding and rise, the starter will become more vigorous and may rise by up to 100% in less than 24 hours. Bubbles will be very evident on the surface as well as through the side of the jar.

It may have quite a sour or tangy aroma.

Day 5
If the starter has not doubled in size, continue the process above and feed every 12 hours until it has doubled in 8 hours or less.

From here, the sourdough starter is considered ‘active’ and is ready for use.

Keeping your sourdough starter
Once you have an active starter it can be kept at room temperature or stored in the fridge.

If you you’re not planning to use the starter often, it is best to store it in the fridge where it will require less maintenance. To do this, just feed as instructed previously, seal the jar and then stand at room temperature for 2-3 hours (to help reinvigorate the yeast) before placing in the fridge to store.

A starter stored in the fridge will only require feeding once a week to maintain it.

Alternatively, if you plan to use the starter regularly, the starter can be stored at room temperature and will require to be fed daily at approximately the same time.

How to count macro-nutrients

2734609_orig

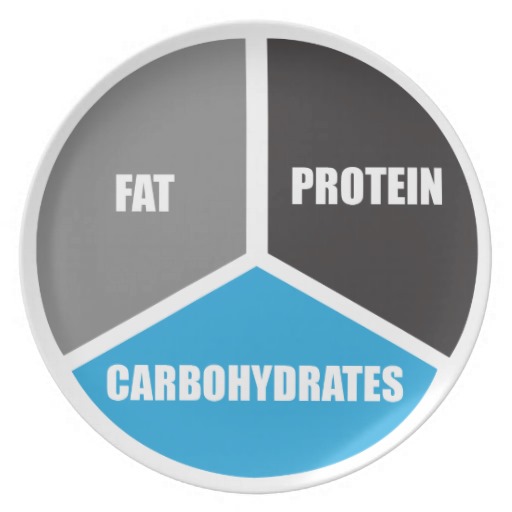
The term macro-nutrients (macros) originates from the Greek word makros, meaning large. Macros are the nutrients you require daily in large amounts.

Macro-nutrients provide the body with energy (calories) and provide the building blocks of cellular growth, immune function, and overall repair. They are:

  • Fat. 9 calories / gram;
  • Protein. 4 calories / gram;
  • Carbohydrate. 4 calories / gram.

Your body also requires micronutrients in smaller amounts, such as vitamins and minerals.

Fats
Of all the macro-nutrients, fats (and oils) provide the most energy (calories) per gram. Important for critical functions such as nutrient absorption (especially the fat soluble vitamins A, D, E & K), hormone production, temperature regulation and providing an alternative energy source (in fact, cardiac muscle cells derive up to 90% of their energy requirement from fatty acids).

Dietary fats are either saturated or unsaturated.

Saturated fats come mostly from animal sources. At the chemical level they are tightly packed and have no double bonds, hence the term saturated. These fats are generally solid at room temperature and tend to be shelf-stable for a longer period of time.

Unsaturated fats include those that are monounsaturated or polyunsaturated. Chemically, these fatty acids are loosely packed and have either a single (mono) or multiple (poly) double bonds. The important Omega-3 fatty acids belong in this group. Unsaturated fats are generally in liquid form even when refrigerated and have a shorter shelf life.

The recommended daily intake is between 20-35% of the total caloric intake, although many people find optimal function and performance at higher levels.

Good sources of healthy fat include fish, meats, avocado, nuts, butter, olive and coconut oils.

Proteins
Proteins are important for the body to be able to build and repair cells and tissue structures, produce enzymes and hormones as well as regulate your immune system. Protein requirements will vary depending on individual body weight and fitness levels.

Typical recommendations for protein intake is between 15-25% of the total caloric intake.

Good sources of protein include meat, fish, poultry, eggs, lentils and diary products.

Carbohydrates
Carbohydrates provide the body with fuel. They are broken down into sugars by the body and either provide immediate energy or are stored in the liver and muscles for later use in the form of glycogen.

Carbohydrates can either be complex or simple.

Simple carbohydrates (monosaccharides and disaccharides) are made up of either one or two sugar units and can be broken down fairly quickly in the body. Simply put, blood sugar levels typically rise quickly, then drop just as quick after the consumption of simple carbohydrates.

Complex carbohydrates (polysaccharides and oligosaccharides) are made up of long strings of sugar units that take longer to break down for use in the body. Due to these longer strings of sugars, complex carbohydrates take longer to be broken down and as such, generally have a lesser impact on blood glucose levels.

In addition to providing fuel to the body, complex carbohydrates, particularly fiber, can help the body to maintain healthy digestive function and a reduction in LDL cholesterol levels.

Although high, typical recommendations for carbohydrate intake is between 45-65% of the total caloric intake.

Good sources of carbohydrates include fruits, vegetables, tubers and grains.

How to actually count macro-nutrients
Use the following steps to effectively count macro-nutrients:

  1. Identify how many calories you want to eat each day.
  2. Identify the ratio of macro-nutrients that you want to consume. The current recommendations in Australia are as follows:
    • Fat: 20-35%
    • Protein: 15-25%
    • Carbohydrate: 45-65%
  3. Multiply the total daily calories by the identified percentages.
  4. Divide the calorie amounts by the macro-nutrient calorie-per-gram number.

The Example
Our case athlete is following a 2,000 calorie diet using 25% fats, 25% protein and 50% carbohydrates.

Fat (9 calories / gram)

  • 25% of 2,000 calories = 500 calories of fat per day
  • total amount of fat per day = 500/9 = 56 grams

Protein (4 calories / gram)

  • 25% of 2,000 calories = 500 calories of protein per day
  • total amount of protein per day = 500/4 = 125 grams

Carbohydrates (4 calories / gram)

  • 50% of 2,000 calories = 1,000 calories of carbohydrates per day
  • total amount of carbohydrates per day = 1,000/4 = 250 grams

From these simple equations we can determine how many grams for each macro-nutrient our case athlete should be eating per day. With the above example to achieve the goal of 2,000 calories our case athlete would need to eat 56 grams of fat, 125 grams of protein and 250 grams of carbohydrates.

Let us look at one more case athlete. Still following an 2,000 calorie diet, but following a fairly standard ketogenic nutrition plan using 65% fats, 25% protein and 10% carbohydrates.

Fat (9 calories / gram)

  • 65% of 2,000 calories = 1300 calories of fat per day
  • total amount of fat per day = 1300/9 = 144 grams

Protein (4 calories / gram)

  • 25% of 2,000 calories = 500 calories of protein per day
  • total amount of protein per day = 500/4 = 125 grams

Carbohydrates (4 calories / gram)

  • 10% of 2,000 calories = 200 calories of carbohydrates per day
  • total amount of carbohydrates per day = 200/4 = 50 grams

For ketogenic case athlete to achieve the same goal of 2,000 calories they would need to eat 144 grams of fat, 125 grams of protein and 50 grams of carbohydrates.

Two different case athletes with different macro-nutrient breakdowns and achieving the same total caloric intake.

Final thoughts
Each macro-nutrient has important role in the body, essential to optimal health and performance. Understanding how to count these macros can produce a variety of health benefits, including the improvement in the overall quality of diet, smarter food choices and portion control, which when combined with a healthy exercise program can assist in reaching specific goals including improved body composition, lean muscle growth and / or effective weight loss.

When I track my calories I have found the CRONOMETER application to be a great tool for not only tracking macros, but have found that it also tracks more vitamins and minerals than any other application on the market.

Why you should be eating summer squash

https---storage.googleapis.com-gen-atmedia-3-2015-06-784f9d200e646e3c208e757633c1e15049021818

Why it’s a superfood?

  • High in vitamin A and antioxidants (beta-carotene, lutein and zeaxanthin);
  • Good source of vitamins B6, C, K, folate, thiamine, magnesium, manganese, potassium and copper.

Healthy evidence
An article posted in the journal Public Health Nutrition reported that squash extracts reduced symptoms of a common condition affecting older men, benign prostatic hypertrophy. The high content of lutein may also help against dementia associated ageing, as suggested by a 2010 review article in the journal Clinics in Geriatric Medicine.

Making the most of Summer Squash
Most of the nutrients in summer squash hold up well to cooking. Unfortunately, those that do not are the nutrients present in the largest amounts. The high water content and delicate flesh argue for rapid cooking with little or no liquid, such as roasting or sauteing.

Simple Strength Revisited

barbell-1024x683-1

If you want to get stronger… lift weights.

Not the easiest of things to do with all gyms currently closed due to the COVID-19 outbreak and the government enforced lockdowns. They will however, reopen. Hopefully as early as next month.

When that happens I’m sure there will be many aspiring athletes and everyday gym goers who will  be itching to get back into the strongman’s room eager to lift as much weight as possible in an attempt to catch up on the workouts missed during the lockdown.

To avoid immediate overtraining or injury, some smart programming will be required. For most people it will have been two or more months since their last heavy workout. A loss in strength and conditioning is to be expected. That is ok.

Here is a strength routine that I picked up from strength coach Dan John and have used on occasion with success after periods of time away from the gym. It’s not too taxing on the body and can be completed several days per week.

It’s simple… but sometimes simple works.

The Protocol
First pick a compound exercise from the basic movement patterns.

  • Squat: front or back squat
  • Hinge: deadlift
  • Push: bench or overhead press
  • Pull: pull-up or power clean

Then find out how much weight you can move for 5 repetitions. For most people, it’s about 80% of your 1RM.

Use the following lifting scheme: 1 – 2 – 3. That’s 6 repetitions. Pretty simple. Complete a single repetition, rest shortly, complete a double, rest, then complete a triple. Rest as long as required between lifts. The aim is to complete every lift without failure.

Complete this method three times. It should look like this: 1-2-3, 1-2-3, 1-2-3. Now you have completed 18 repetitions at your 5RM for each working set! Well done.

The Rules:

  1. Don’t miss a repetition. Make every lift.
  2. Don’t chase fatigue.

The weight should feel easy enough to move quickly. Increase the resistance over time from workout to workout. The best part about this lifting method is that you don’t even have to change your program to add these, you can just add a set here and there to your current program.

I usually pick movement pattern and conduct an exercise as my main lift for the day, then follow up with some accessory work to round out the session.

Homemade pumpkin soup

481-503664-1

The winter months usually means warm and hearty meals are back on the dinner menu. Nothing beats a warm and delicious soup after a long day out battling the elements.

Simple, flavoursome and nutritious, this soup can be made from scratch at home in about 30 minutes. Perfect for those cold winter nights.

Here is a quick 5 ingredient recipe.

Ingredients (serves 2)

  • 500g x pumpkin;
  • 1 x small potato;
  • 1 x onion;
  • 2 tsp x minced garlic;
  • 150ml x bone broth.

Boil the pumpkin and potato and onion until soft. Drain and add all of the ingredients and place into a blender or NutriBullet. Blend for 45-60 seconds. That’s it. You’re done.

Before serving, garnish with parsley, spring onion and / or sour cream.

Nutritional breakdown (153 kcal / per serve)

  • Protein: 6.7g
  • Fat: 0.5g
  • Carbohydrate: 27.7g
  • Vitamin A: 14,500IU (483% of RDI)
  • Vitamin C: 26mg (28%)
  • Iron: 2.1mg (26%)
  • Magnesium: 51mg (12%)
  • Potassium: 1130mg (33%)